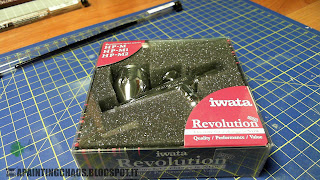
I have been considering buying a single-action airbrush for quite some time now and after seeing on YouTube two great reviews of the Iwata Revolution Mini HP-M2 I've come to the conclusion that this is the airbrush I was looking for.
The Revolution MINI Series is a line of three small-footprint airbrushes all of which are single action, gravity feed and with internal mixing of paint and air. The differences between the three models lay in the size of the needle and the capacity of the paint cup:
| Model | Needle | Capacity |
| HP-M | 0.30 | 1 ml |
| HP-M1 | 0.30 | 1.5 ml |
| HP-M2 | 0.40 | 7 ml |
The HP-M2 is the heavy-duty model of the new Revolution MINI Series with is 0.40 needle and a colour cup that can hold more than half the colour you found in a Games Workshop paint bottle. It's ideal for priming and base-coating many models or vehicles in a row or to drench them in varnish :)
Inside the little plastic box, along with the airbrush, you find the standard Iwata-branded little wrench and, hidden beneath the protective foam, the 2-page user manual written in English and Japanese
The airbrush is really small, about half the size of one of it's big brothers, the Iwata Hi-Line HP-BH, but it's still comfortable to hold in your hand
The amount of paint sprayed by a single action airbrush is fixed and it not depend on how you control the trigger like in double action airbrushes so you could get an even base-coat more easily and in less time that you would with a double action brush.
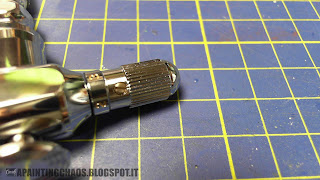
In the case of the Revolution Mini airbrushes, you could actually modify this fixed amount of paint using the paint flow regulator located at the end of the airbrush body. And this is a very helpful feature as you can adjust it depending of the viscosity of what you are shooting.
 |
| The paint flow regulator |
After inspecting the airbrush for signs of damaged or defective parts it was time to connect it to my compressor. I use a quick-connect connector on all my airbrushes and compressors so the first step was to attach one to the HP-M2: as you can see in the picture below I put a layer of Teflon tape on the airbrush connector before hooking up the quick-connect adaptor to insulate the join and prevent any air leak. I do this on all the air connections and I've never had a air leak since. Just do tighten it up to much or you would block the air flow!
When all was ready I proceeded to splay a couple of cup-full of cleaning liquid to get rid of the anti-corrosion fluid laying around inside the brush and the paint cup and I then sprayed some Vallejo Surface Primer on a piece of plastic at around 25 PSI (the pressure suggested by Vallejo for that primer) and I have to tell you that it was a really simple and fast job to get a smooth solid coat of primer over the white plastic
I was very satisfied by the HP-M2 and I'm gonna use it as my primer / base-coat / varnish airbrush from now on!


No comments:
Post a Comment